
7 Steps to Remove Salt Stains From Leather Boots

Last Updated: November 5, 2026
Quick Summary
Remove salt stains from leather boots by first brushing off loose salt dry, then wiping with a barely damp cloth of distilled water. For dried marks, dab a mix of one part white vinegar to one part distilled water, then air-dry away from heat and condition once fully dry.
- Brush loose salt and grit off dry before any water touches the leather.
- Mix one part white vinegar with one part distilled water and dab it on stubborn marks.
- Air-dry boots at room temperature for 24 to 48 hours, never on a radiator.
- Condition only once the leather is completely dry, then buff off the excess.
- Re-treat boots every few weeks in heavy use and after any dull or dry session.
Table of Contents
- Why Road Salt Leaves White Marks on Leather Boots
- What You'll Need Before You Start
- Step 1: Brush Off Loose Salt and Dirt
- Step 2: Wipe Light Salt Residue With Water
- How to Remove Dried Salt Stains From Leather
- Vinegar and Water for Salt Stains on Leather
- How to Dry Wet Leather Boots Without Cracking Them
- How to Prevent Salt Stains on Boots Next Winter
- Restoring the Finish: Conditioning and Polishing
- Troubleshooting Marks That Keep Coming Back
- Frequently Asked Questions
Why Road Salt Leaves White Marks on Leather Boots
Those chalky white tide lines across your boots are not dirt. They are salt crystals left behind after road grit dries, and they pull moisture out of the leather as they form. Leave them long enough and the leather cracks along the creases.
Salt stains are the dried mineral residue that road grit leaves on leather once the water carrying it evaporates. The salt draws moisture from the hide, dries the fibres, and leaves a hard white crust that works its way into the grain.
Boots exposed to road salt often look grey and stiff, and owners may assume the leather is finished. Usually it is not. The damage is mostly surface dehydration, and it can reverse if you act before the salt has sat for weeks.
The trick is sequence. Most people grab a cloth and scrub, which drives the salt deeper. Get the order right and the marks lift cleanly.
Below, we walk through the full seven-step process, from dry brushing to reconditioning, plus the drying mistakes that cause cracking and the prevention routine that stops the problem returning.
What You'll Need Before You Start
Gather your kit first, because stopping halfway through leaves wet leather sitting on the bench. You need a soft brush, a clean cloth, a sponge, distilled water, white vinegar, and a leather conditioner.
Here is the short list:
- A soft horsehair brush for loose salt and dirt
- Two clean cloths, one for washing and one for drying
- A soft sponge for applying cleaner
- Distilled water, which avoids leaving new mineral marks
- White vinegar for stubborn, dried-on stains
- A pH-balanced leather cleaner
- Leather conditioner and polish for the finish
- A test patch area, ideally the inside of the heel
Skip the household trick of neat vinegar or washing-up liquid. Both strip the oils that keep leather supple.
If your kit is missing pieces, our Field and Moor Leather aftercare Boot cleaning kit includes brushes, a cloth, a delicate cream and a leather gel in one zip bag.

Step 1: Brush Off Loose Salt and Dirt
Start dry. Brushing removes the loose salt and grit before any water touches the leather, and that single step prevents most of the damage.
Work outside or over newspaper. Use a soft brush in short strokes, following the grain rather than scrubbing across it.
- Knock the boots together to shed heavy grit
- Brush the welt and stitching, where salt collects
- Pay attention to the creases at the toe
- Tap the brush out as it loads with white powder
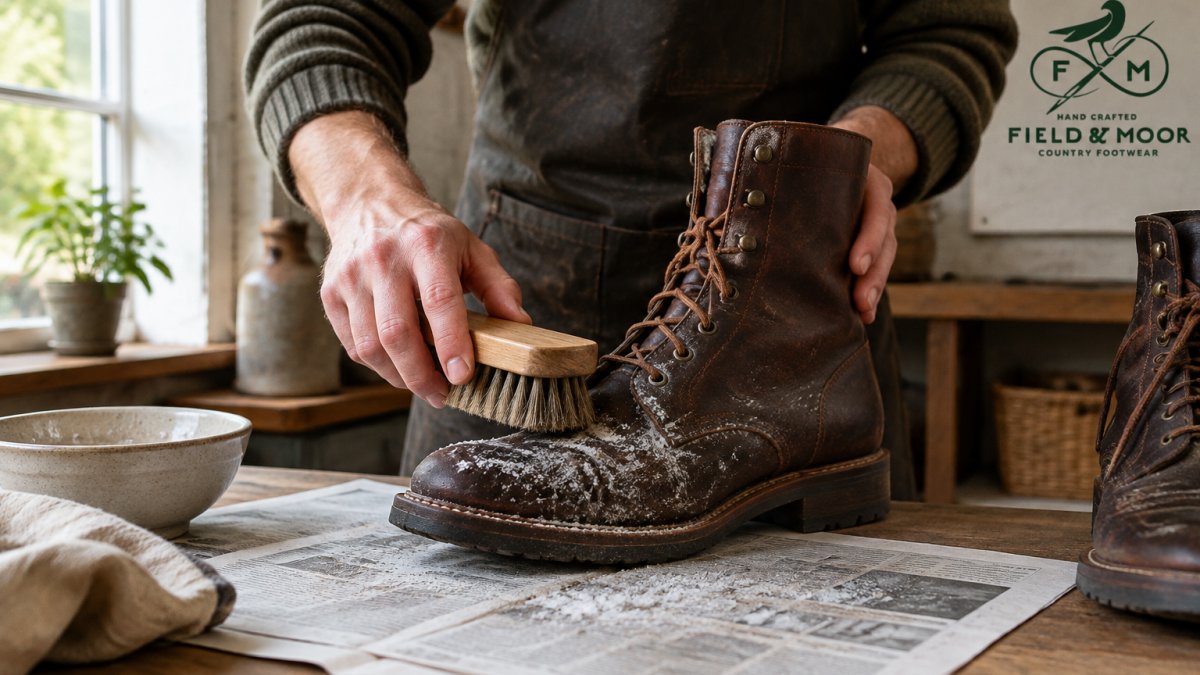
A common mistake is skipping this and going straight to a wet cloth. That turns the salt into a brine that soaks into the grain, and you end up chasing the stain for weeks.
If you want a brush built to last, our horse hair wooden boot brushes are a stylish option for keeping boots in good condition.
Step 2: Wipe Light Salt Residue With Water
Light, powdery residue usually lifts with water alone. Dampen a clean cloth with distilled water, wring it out until it is barely wet, and wipe the affected area in one direction.
Rinse the cloth often. Fold it so you always have a clean face, and swap it for a fresh one when it starts looking grey.
Then leave the leather to air-dry away from heat before you judge the result. Damp leather always looks darker, and it is easy to over-clean a patch that was already fine.
Watch out: over-wetting can cause discolouration and a swollen, floppy toe box. If water beads on the surface rather than soaking in, stop.
How to Remove Dried Salt Stains From Leather
Dried salt stains need a staged approach, not more force. Work from the gentlest method upward and stop as soon as the mark lifts.
Use this order:
- Dry brush the crust away
- Wipe with a damp cloth
- Apply a diluted vinegar solution
- Use a pH-balanced leather cleaner
- Condition once fully dry
Apply cleaner with a soft cloth or sponge, working a small area at a time. Use circular motions with light pressure, and let the product sit for a minute before wiping.
Never soak the leather. A damp surface is fine; a wet one is not.
If the stain is soaked-in residue rather than surface crust, expect two or three short sessions rather than one long one. Patience beats scrubbing every time.
Vinegar and Water for Salt Stains on Leather
A diluted white vinegar solution is the standard fix for stubborn salt marks. Mix one part white vinegar with one part distilled water, then dab it on with a cloth.
Keep the mix weak and the contact short.
- Test on a hidden patch first and wait ten minutes
- Dab, do not pour
- Keep vinegar away from suede and nubuck
- Wipe with clean water afterwards to remove residue
- Condition once the leather is dry
Watch out: vinegar left on the surface, or used neat, dulls the finish and dries the leather further. Rinse and condition afterwards, every time.
If a mark survives two rounds, stop and move to a proper leather cleaner. Repeated acid on the same spot does more harm than the salt did.
Field and Moor Leather aftercare Boot cleaning kit →
How to Dry Wet Leather Boots Without Cracking Them
Air-dry leather boots at room temperature, away from radiators, stoves and direct sun. Slow drying is the whole game. Fast heat pulls moisture out unevenly and cracks the finish.
The mechanism matters here. Leather is a network of collagen fibres holding water and oils in balance. When the surface dries faster than the core, the outer layer shrinks while the inner layer is still swollen. That tension shows up first as a stiff, papery feel, then as fine cracks along the flex points at the toe and instep. Salt makes it worse because it has already pulled moisture from the fibres, so the leather has less reserve to give up slowly.
Stuff the boots loosely with newspaper or plain paper to hold their shape. Change the paper when it feels damp, and do not pack it tight enough to stretch the upper. Unlace and open the tongue so air can move through the throat.
- Never dry on a radiator or in front of a fire
- Never use a hairdryer, even on a cool setting
- Keep them out of direct sunlight
- Leave 24 to 48 hours for a proper dry
- Turn them on their side for the first few hours so any trapped water can run out of the welt
A common pattern is to check the boots after a few hours, feel damp leather, and assume they are still soaked. Damp leather always looks darker and feels cooler than dry leather, so judge by weight and flexibility rather than colour. If the boot still feels heavy or the toe box is floppy, give it more time.
Watch out: drying in a warm airing cupboard or beside a radiator feels faster but drives moisture out of the surface first, which is exactly the uneven drying that causes cracking and a dull, patchy finish.
Once dry, the leather will likely feel stiff and may look slightly paler than before. That is normal, and it is the signal to condition. Do not condition while any dampness remains, or you trap moisture under the product and end up with a soft, mouldy patch rather than a supple one. If the boots are still damp after 48 hours, move them to a drier room rather than adding heat.
How to Prevent Salt Stains on Boots Next Winter
Prevention is a two-part routine: treat the leather before winter, then clean little and often through the season. The gap most guides leave is timing and product choice, which is where salt damage is actually won or lost. That same attention to timing and gentle product choice helps clean leather without damage when the boots have already had a previous life.
Before the first gritting, clean the boots and apply a protective treatment. A conditioner followed by a waterproofing layer gives salt a surface it struggles to cling to. The order matters: condition first to replace oils, then waterproof to seal. Applying waterproofing to dry, unconditioned leather traps a thirsty surface underneath and the finish cracks at the creases within weeks.
Product type changes the routine:
- Wax-based treatments give the strongest salt and water resistance but darken leather and need buffing; best for smooth, oiled and waxy leather
- Spray waterproofers are lighter and suit lighter-coloured or suede and nubuck boots, but need reapplying more often
- Cream conditioners restore suppleness but offer limited water resistance on their own, so pair them with a spray or wax
Through winter, rinse and wipe after wet, gritty days rather than waiting for the weekend. A minute with a damp cloth beats an hour of restoration. A useful rule is to clean whenever you can see a white tide line forming at the welt or in the creases, because that is salt starting to concentrate before it becomes a visible stain.
Also:
- Keep a brush by the door and knock grit off on arrival
- Rotate two pairs so each has time to dry fully between wears
- Store boots on a rack, never in a sealed bag, so residual moisture can escape
- Re-treat every few weeks in heavy use, and after any session where the leather looks dull or feels dry
- Keep boots away from underfloor heating and hot pipes in storage, which dry leather out over the season
Watch out: over-application of wax or waterproofing builds a sticky layer that attracts grit and traps salt against the grain, so thin coats buffed off are better than thick ones left to sit.
For related advice on keeping new leather comfortable, see our guide to preventing blisters when breaking in new leather boots.
The article lays out how each type of protective treatment performs so you can pick the right one for your boots.
| Treatment type | Best for | Key difference |
|---|---|---|
| Wax-based treatments | Smooth, oiled and waxy leather | Strongest salt and water resistance but darken leather and need buffing |
| Spray waterproofers | Lighter-coloured or suede and nubuck boots | Lighter but need reapplying more often |
| Cream conditioners | Restoring suppleness | Limited water resistance on their own, so pair with a spray or wax |
Restoring the Finish: Conditioning and Polishing
Conditioning replaces the oils the salt and cleaning stripped out. Do it once the leather is completely dry, or you trap moisture inside.
Apply a small amount of conditioner with a cloth or applicator brush, working it into the grain in thin layers. Let it absorb, then buff off the excess.
- Use a pH-balanced leather gel or cream
- Go thin rather than heavy
- Work along the creases and the welt
- Buff with a soft, lint-free cloth
- Finish with polish if you want a shine
Our cleaning kit includes a Collonil leather gel and a delicate cream for conditioning the leather.
Then leave the boots overnight before wearing them in wet conditions.
Troubleshooting Marks That Keep Coming Back
Recurring white marks usually mean one of three things: salt still trapped in the stitching, a dried-out finish, or a leather type that needs different handling.
Check the construction first. Salt sits in welt stitching and behind the tongue. Brush and wipe those areas specifically.
Then check the leather type:
- Smooth leather: water, diluted vinegar, then conditioner
- Oiled or waxy leather: use a dedicated cleaner and re-oil afterwards
- Suede and nubuck: brush only, no water, no vinegar; use a suede eraser
- Patent or polished finishes: wipe with a damp cloth only
If the mark returns in the same spot after a proper clean, the finish may be worn through. A conditioner and polish routine usually restores it. If the leather feels rough or the colour has lifted, the damage is deeper than salt, and it is worth a professional repair rather than more cleaning.
One more thing: never mix methods. Vinegar followed immediately by a heavy wax, or water on suede, creates new problems faster than it solves old ones.
Winter grit is relentless, and cheap boots rarely survive more than a few seasons of it. Field & Moor boots feature thick, soft leather uppers, Goodyear and storm-welted construction, and a waterproof Sympatex lining. Pair them with the Field & Moor cleaning kit and a regular conditioning routine, and the salt comes off instead of settling in. Get started with Field & Moor and keep your boots looking right through every winter.
Frequently Asked Questions
Can vinegar remove salt stains from leather boots?
White vinegar diluted with water can lift stubborn salt stains, but only on smooth leather and only after a patch test. Mix one part white vinegar with one part water, dab it on with a soft cloth, and wipe it off within a minute. Never flood the leather or leave the solution sitting on the surface. Vinegar is acidic, so rinse with a barely damp cloth and condition the boots afterwards to replace lost oils.
Can salt stains permanently damage leather boots?
Salt itself does not usually destroy leather, but leaving it on does. Salt draws moisture out of the hide as it dries, which leads to cracking, stiff panels and discoloration around the flex points. The longer the residue sits, the deeper it works into the grain. Brushing and wiping boots within a day or two of wear in winter conditions prevents most lasting damage, and conditioning afterwards keeps the leather supple.
Do you need to condition leather boots after removing salt stains?
Yes. Water, vinegar and repeated wiping all strip some of the natural oils from the leather, so conditioning is part of the job, not an optional extra. Apply a leather conditioner or gel once the boots are completely dry, working it in with a soft cloth or applicator brush. A kit such as the Field & Moor Leather Aftercare Boot Cleaning Kit (£36.00) includes Collonil Delicate Cream and Leather Gel.
How should you dry leather boots after cleaning them?
Air-dry them at room temperature, away from radiators, stoves and direct sunlight. Stuff the boots loosely with newspaper or use cedar shoe trees to hold their shape and draw moisture out from inside. Never use a hair dryer or place wet boots on a heat source, because fast drying pulls moisture from the leather and causes cracking. Allow 24 to 48 hours depending on how wet they are, then condition.
