
How to Maintain Leather Boots Step by Step: 2026 Guide

Table of Contents
- Step 1: Gather Your Leather Boot Cleaning Kit Essentials
- Step 2: Prepare the Boots and Remove Surface Grime
- Step 3: Clean with a Damp Cloth and Leather Cleaner
- Step 4: Dry Naturally and Reshape with Shoe Trees
- Step 5: How Often to Condition Leather Boots
- Step 6: How to Waterproof Leather Boots and Protect the Grain
- Step 7: Polish, Buff and Build a Patina
- Troubleshooting, Seasonal Care and Sustainable Choices
- Frequently Asked Questions
Last Updated: September 14, 2026
Step 1: Gather Your Leather Boot Cleaning Kit Essentials
Learning how to maintain leather boots step by step starts with the right kit, because the wrong tools do more damage than no tools at all. Leather is skin: it needs gentle abrasion, not scrubbing.

A complete leather boot cleaning kit essentials setup includes:

- A soft horsehair brush for dust and polish
- A second brush reserved for mud and grit
- A damp cloth, lint-free
- pH-balanced leather cleaner
- Leather conditioner or cream
- Shoe trees, preferably cedar
- Waterproofing spray or wax
The Field and Moor Leather aftercare Boot cleaning kit at £26.25 bundles a super-soft horsehair polishing brush, cleaner and conditioner in a zip-up leather travel bag. The super soft horshair branded F & M brush will not scratch even the finest of leathers and ensures a high quality shine. Size 135 x 41 m
Step 2: Prepare the Boots and Remove Surface Grime
Preparation is the step most people rush, and it's the one that determines whether the rest of the process works. Surface grime, dried mud and road salt all need removing before any liquid touches the leather, or you'll push abrasives into the pores.
Work in this order:
- Remove shoelaces and set them aside to wash separately.
- Knock the soles together outdoors to shed loose mud.
- Brush off surface dirt with a dry brush, working in small circles.
- Pay attention to the welt and the seam where upper meets sole.
Removing Shoelaces and Checking the Grain
Laces trap grit against the tongue and eyelets, so take them out entirely rather than loosening them. While the boots are open, check the grain: full-grain leather shows visible pores and a natural surface, while corrected-grain has been sanded smooth. Suede and nubuck have a raised nap and need a completely different approach. If the nap lifts when you brush it, keep water away and use a suede brush instead.
Step 3: Clean with a Damp Cloth and Leather Cleaner
Cleaning leather boots is a matter of restraint: a barely damp cloth and a small amount of cleaner, worked in sections. Soak the cloth, wring it until it stops dripping, then wipe the upper in smooth strokes. Add a few drops of leather cleaner to the cloth, not directly to the boot.
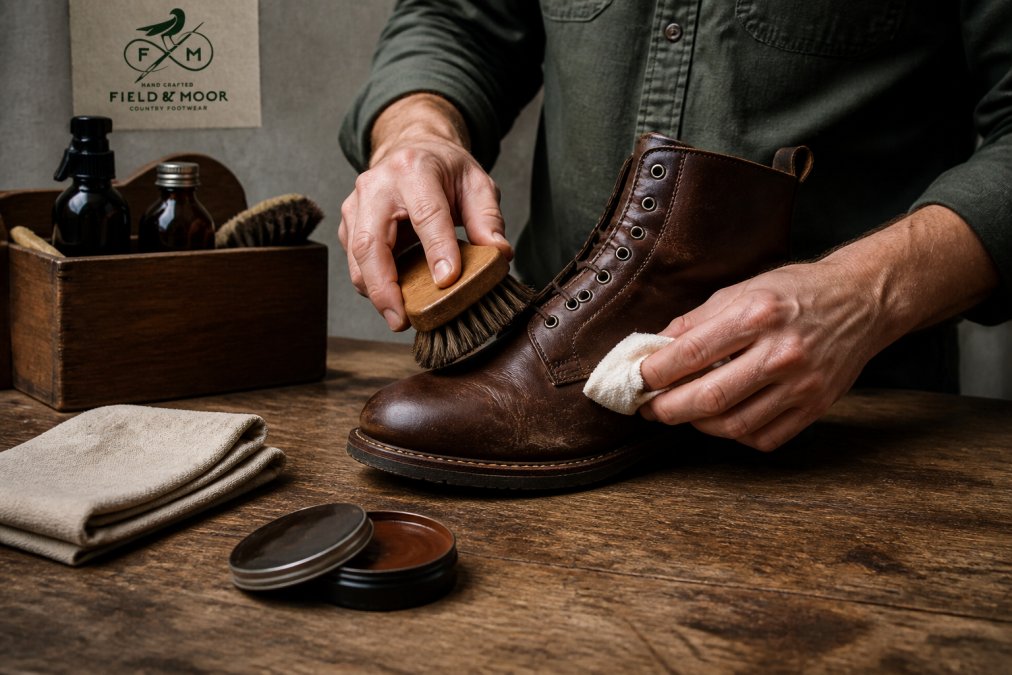
But "leather" is not one material, and the method above only suits smooth, finished leather. Before you touch the boot with anything wet, identify what you are actually cleaning:
- Full-grain and top-grain (smooth, finished): the damp-cloth method above. Use a pH-balanced cleaner, work in sections, and keep water to a minimum.
- Suede and nubuck (raised nap): never use a damp cloth or liquid cleaner. Brush the nap with a dedicated suede brush, then use a suede eraser or a purpose-made suede shampoo applied sparingly with a sponge. Water leaves tide marks that are difficult to lift.
- Patent leather (high-gloss, lacquered finish): wipe with a soft, slightly damp cloth only. Abrasive cleaners and brushes dull the lacquer permanently. A little petroleum jelly on a cloth restores shine without stripping the finish.
- Oiled and waxed leather (pull-up, dubbin-finished): clean with a damp cloth, then re-oil or re-wax rather than using a detergent cleaner, which strips the oils the finish depends on.
- Corrected-grain (sanded and coated): treat like smooth leather, but be gentler, the surface coating is thinner and scratches show as lighter marks.
For stubborn patches of surface grime on smooth leather, use the horsehair brush in light circles. Salt stains need a diluted white vinegar solution (roughly one part vinegar to three parts water) on a cloth, blotted rather than rubbed, followed by a clean damp wipe (netFormulary). Never saturate the leather. If the upper darkens dramatically, you have used too much water.
Step 4: Dry Naturally and Reshape with Shoe Trees
Drying is where good boots are saved and bad habits ruin them. Never place leather boots near a radiator, fire or direct sun, because heat drives out the natural oils that keep the leather supple and causes cracking (Leather Through the Ages).
Instead:
- Stuff the boots with cedar shoe trees while still slightly damp
- Let them dry at room temperature for 12 to 24 hours
- Rotate between pairs so each has a full day to recover
- Replace newspaper stuffing if the boots were soaked through
Cedar shoe trees absorb moisture and hold the shape of the boot as it dries, which prevents creasing across the vamp. They also leave a faint cedar scent that keeps moths away between seasons.
Step 5: How Often to Condition Leather Boots
Conditioning frequency depends on wear, not the calendar. Knowing how often to condition leather boots matters because over-conditioning softens leather until it sags, while under-conditioning leads to drying out.
| Wear Pattern | Condition Every | Watch For |
|---|---|---|
| Daily outdoor wear | 4-6 weeks | Dry patches, light creasing |
| Weekly country use | 2-3 months | Faded colour, stiff feel |
| Occasional smart wear | 4-6 months | Dull surface, fine cracks |
| Wet or muddy conditions | After every deep clean | Salt stains, water marks |
Apply conditioner with a round applicator brush, working it into the grain with small circles. Let it absorb for 20 minutes, then buff off the excess. The leather should feel nourished, not greasy.
Step 6: How to Waterproof Leather Boots and Protect the Grain
Waterproofing adds a protective coating that repels rain and stops salt and mud from bonding to the surface. Learning how to waterproof leather boots properly means applying protection to clean, conditioned, dry leather, never over dirt.
Choose your product by leather type and by how the product actually works:
- Beeswax and dubbin: these sit on the surface and fill the grain, forming a physical barrier. Best for full-grain country boots and heavy outdoor use. They darken leather slightly and reduce breathability, so avoid on lighter or dress leathers.
- Fluoropolymer and silicone sprays: these bond to the surface at a molecular level and repel water without changing colour or feel. Suited to suede, nubuck and lighter leathers. They need reapplying more often than wax and offer less abrasion resistance.
- Wax-based polish: adds a light water-repellent layer while shining. Good for smart boots that see occasional rain rather than sustained wet.
- Oil-based treatments (mink oil, neatsfoot): condition and add some water resistance, but they soften leather and can weaken stitching over time if over-applied. Use sparingly and never on suede.
Spray or wax in thin, even coats, holding the can 20 cm from the surface (Reducing spray drift: Overview). Let each coat dry before adding the next. Two thin layers outperform one heavy one every time, and heavy coats clog the pores that let leather breathe.
A Seasonal Protection Schedule
Protection is not a one-off job. Build it into the year:
- Early autumn: deep clean, condition, then apply a full waterproofing treatment before the wet season begins. This is the single most important application of the year.
- Through winter: reapply spray or wax every four to six weeks if you are wearing the boots regularly in rain, snow or on salted roads. Wipe salt off after every outing, do not wait for the weekend.
- Early spring: clean off winter residue, inspect for salt damage and cracking, then condition. Hold off on heavy wax if you will be storing the boots.
- Summer: light conditioning only. If the boots are going into storage, clean and condition but skip heavy waterproofing, which can trap moisture in a warm, closed environment.
Step 7: Polish, Buff and Build a Patina
Polishing is the step that turns maintenance into character. A well-cared-for pair develops patina, the deep, uneven sheen that comes from years of wax, buffing and honest wear. It's the difference between boots that look old and boots that look valuable.
Work in small amounts of leather polish with a round applicator, let it haze over for ten minutes, then buff with a horsehair brush. Finish with a cloth for a mirror shine on the toe cap. For a deeper colour, match your polish to the leather; for a neutral finish, use a clear wax.
Patina is earned, not applied. Two thin coats of wax buffed properly will always beat one thick layer slathered on.
Troubleshooting, Seasonal Care and Sustainable Choices
Most leather damage traces back to a handful of repeat mistakes. Salt stains from winter roads need treating immediately, not in spring, because the salt draws moisture out and leaves white tide marks. Over-oiling with mink oil softens leather until it loses structure. Drying near heat causes cracking that no conditioner can reverse. And using the wrong brush on suede flattens the nap permanently.
A seasonal schedule keeps you ahead of all of it:
- Autumn: re-waterproof before the wet season, check stitching and welts
- Winter: wipe salt off after every outing, dry with shoe trees overnight
- Spring: deep clean, condition, and assess soles for wear
- Summer: light conditioning, store in a cool, dry place with trees in
On the sustainability front, the most eco-friendly choice is the pair you already own. Repairable construction, resoling and reconditioning extend a boot's working life by years, which matters more than any recycled packaging. Look for plant-based waxes and biodegradable cleaners where the performance holds up, and avoid aerosol sprays with high solvent content when a cream will do the job.
For a full day in the field, pair well-maintained boots with socks that manage moisture the same way. House of Cheviot socks, knitted in the Scottish Borders, complement the breathable Sympatex lining in Field & Moor boots by wicking sweat away before it reaches the leather.
Frequently Asked Questions
How often should you condition leather boots?
Conditioning frequency depends on wear and conditions. For boots worn daily in wet or muddy conditions, condition every 4-6 weeks. If worn a few times a week in dry weather, every 2-3 months is sufficient. Signs it is time include leather feeling dry, looking dull, or showing fine cracks. Over-conditioning can clog pores, so always clean first and apply a thin layer. Full-grain leather benefits most from regular nourishment to keep natural oils balanced.
Can I use saddle soap on all types of leather?
Saddle soap is a gentle cleaner suitable for smooth full-grain and top-grain leather, but it is not ideal for suede or nubuck because it can flatten the nap. It also strips some oils, so follow with a conditioner. For everyday cleaning, a damp cloth and dedicated leather cleaner are safer. Always test on a hidden area first. If your boots have a waterproof membrane, avoid over-wetting and let them dry naturally away from direct heat.
What does WD-40 do to leather boots?
WD-40 is a solvent-based lubricant, not a leather care product. Applying it can break down the natural oils in leather, causing it to dry out, crack, and lose its protective finish. It may also darken the leather unevenly and leave a greasy residue that attracts dirt. For waterproofing, use a purpose-made beeswax or silicone-free spray. If you have already used WD-40, clean the boots thoroughly with a leather cleaner and then condition to restore moisture.
How do I waterproof leather boots without ruining them?
Start with clean, dry boots. Apply a waterproofing spray evenly in thin coats, holding the can 20-30 cm away, and let each coat dry. For smoother leathers, a beeswax-based product worked in with a brush offers longer protection. Avoid applying to suede or nubuck without a specific suede protector. Reapply every 4-6 weeks with regular wear. Always test on a small area first. This method preserves breathability while keeping water out.
Leather boots reward consistency more than intensity. A ten-minute routine after each outing, done properly, will outlast any annual deep clean. Field & Moor boots are built for exactly this kind of care, with Goodyear and storm-welted construction, waterproof Sympatex linings and Vibram soles that can be resoled rather than replaced. Get started with Field & Moor and keep your boots performing for years of country and town wear.